Couple words for introduction
Today, I share a repaint for another aircraft that enchanted me. Did you ever hear something like: “Half a ton, anytime, anywhere”. If so, it was probably in reference to this airplane – The DHC-2 Beaver. Beautiful lines, strong engine, great reliability…. but why to write about, it, when it is all in the song:
And Alaska…. Well. I have never been there… but would like to visit it one day. With our more and more realistic flight simulators, even those virtual tours around Alaska are fantastic. Sometimes breathtaking, forgiving it is simulation and just enjoying this big country full of big mountains, large forests, and small towns (mostly). Both sides of the coin, all this beauty, wilderness, but also danger and tough life conditions.
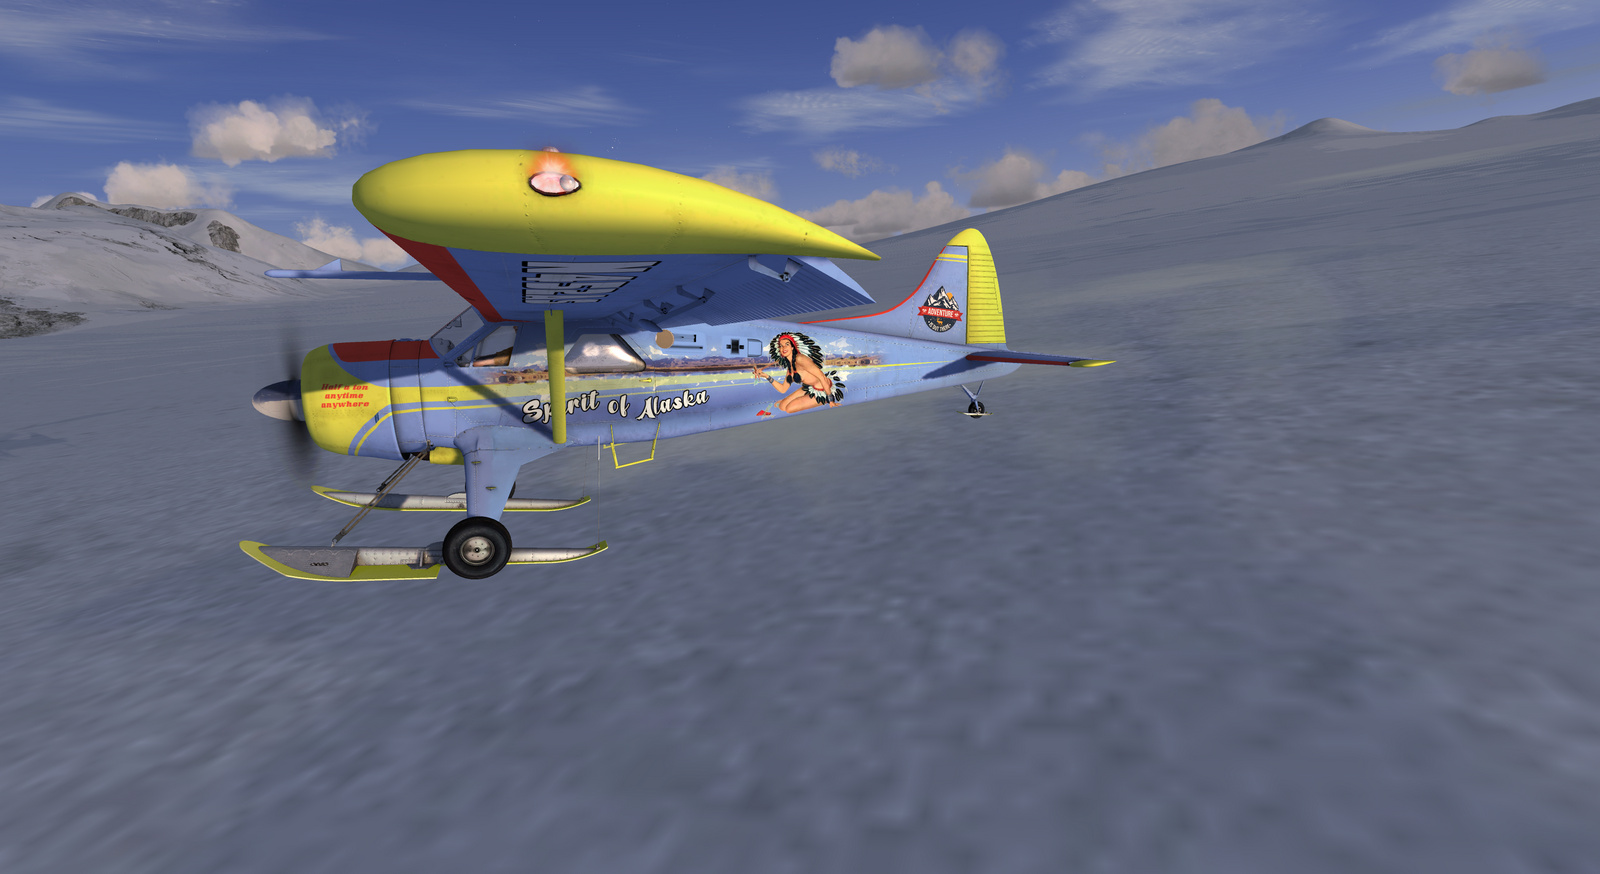
So it may look kind of weird, me, doing repaint in Alaska theme for an aircraft, but, I think, the connection of Alaska and Beaver is somewhat iconic… and what a better bush plane to use in Alaska? Karl May also never visited wild west 🙂
I hope this repaint will not offend anybody, it is really just a tribute – to Alaska and the DHC-2 Beaver.
This repaint is for DHC-2 Beaver from Milviz, made for FSX and Prepar3D. So if you are interested and have this airplane in your virtual hangar, download is somewhere below.
Legal stuff, yes the boring part
The fictional repaint(s) for DHC-2 Beaver airplane is provided as is without any warranty. As you read with most software products, use it at your own risk. I take no responsibility for anything.
The repaint(s) included in this archive was made … just because as many other out there, because I love flight simulation.
Let’s try to write it short for once 🙂
Please respect the following.
Do not use this repaint for any commercial purpose. It is being released as free and is supposed to stay free, as well as all derivative works.
Do not share inappropriate screenshots showing this aircraft repaint. I believe all of you can judge what is appropriate and what not in that flight simulation hobby of ours.
You can redistribute this repaint as you want (but still fo free). It would be nice to keep the notes (so we know who contributed…).
Unless you do your own changes, keeping the Readme file within the archive will do it.
If you want to edit this repaint, you can! But this repaint contains some marks (art), that are not my property and this should be considered in the edited repaint also, thus should be noted. See the 3rd party resources used below.
If you keep those resources, you should mention that in your Readme file. It actually applies to everything, that you may include in your repaint and is not your work.
3rd party resources used
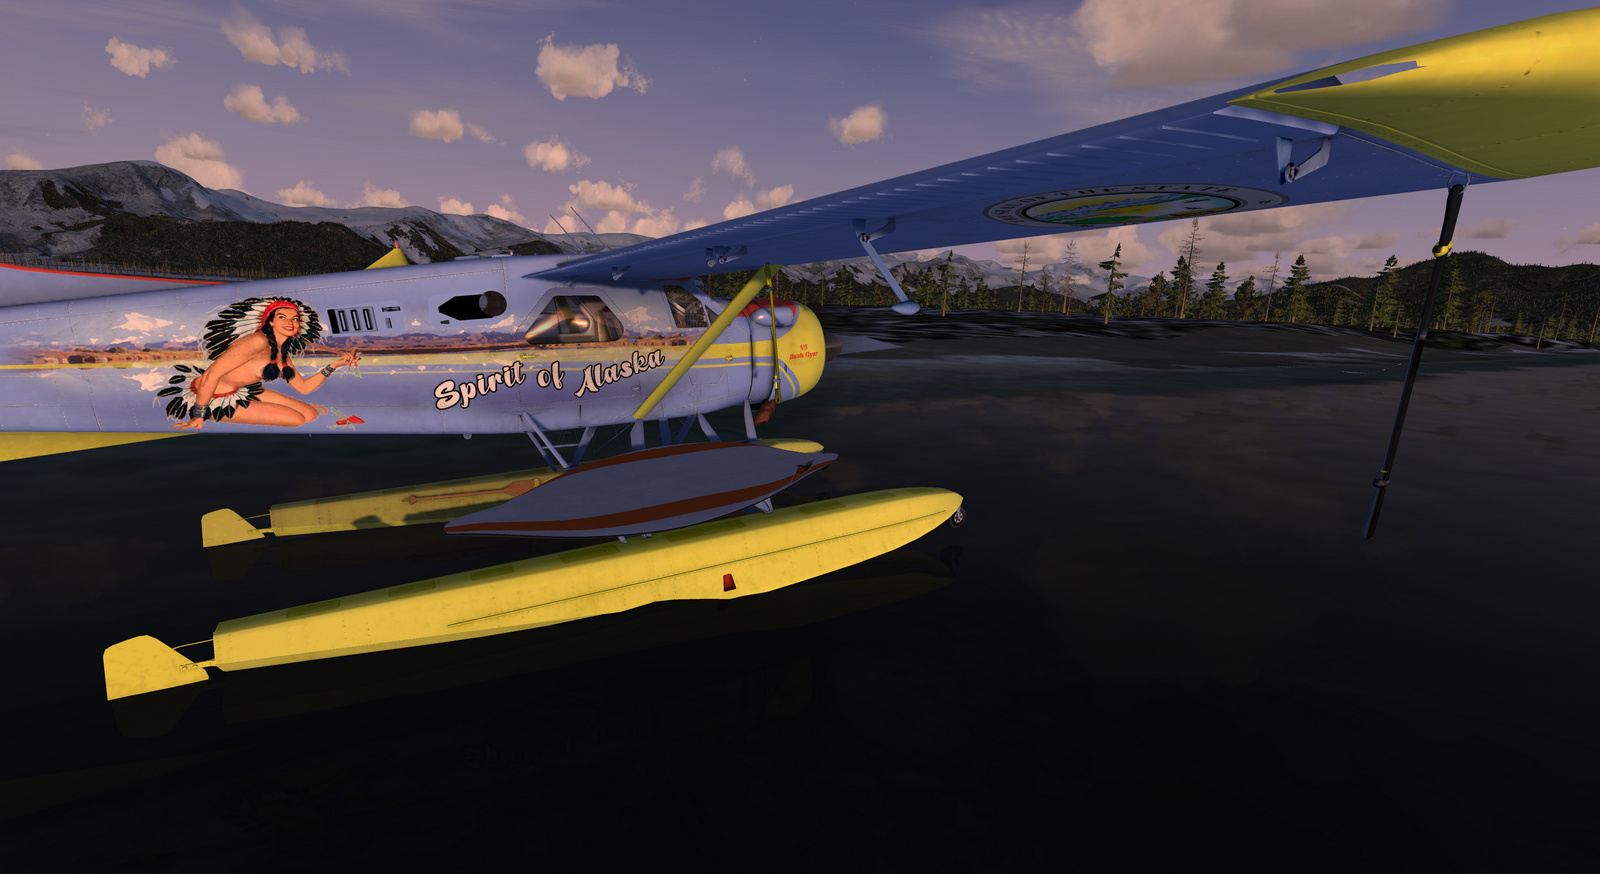
- The Indian Pin-up girl drawing. Author is unknown, not me unfortunately.
- Beaver on top of the cabin.
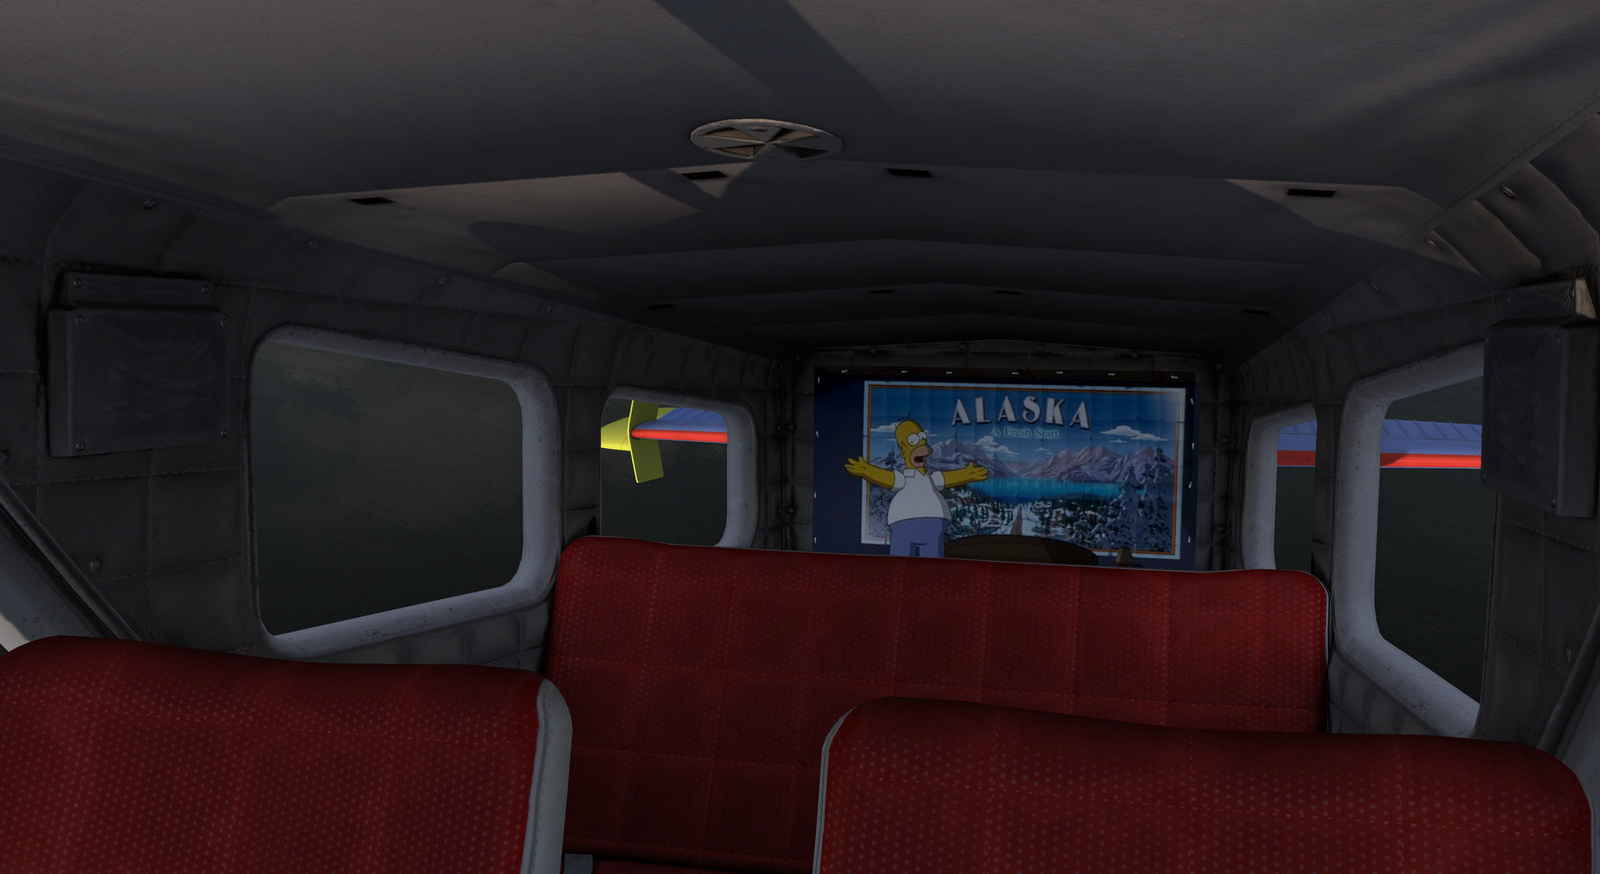
https://icon-library.net/icon/beaver-icon-15.html - Homer Simpsons and Alaska poster from The Simpsons movie in the cabin.
https://funnyjunk.com/Welcome+to+switzerland/fXowLsK/120 - Adventure is Out Here logo on the vertical stabilizer.
https://www.freepik.com - Alaska wallpaper used on the sides of the fuselage.
https://wallpapersafari.com - Alaska Flag.
https://www.vecteezy.com/vector-art/85533-alaska-flag - The seal of the state of Alaska.
https://commons.wikimedia.org/wiki/File:Alaska-StateSeal.svg - The image of the Beaver on the top of the cabin.
https://icon-library.net/icon/beaver-icon-15.html - Alaska bush pilot badge on pilot uniform.
- Baywatch logo on the canoe.
https://www.pinterest.com/pin/374854368966584962/
Download
Below you can download the Mouseviator repaint for Milviz DHC-2 Beaver.
Download from this website:
Download from Google Drive:
Source files:
I know I always write that you can edit my aircraft repaints, but actually shared source files with you just once. And it is kind of hard to edit the repaint without the source files… Well, this is a second time 🙂
If you want to build your repaint on mine, you can download my source files below… But I would like to note, that I use GIMP… so the files are in .xcf format for GIMP, not .psd for Photoshop. I also did not always name the layers, so sometimes you will have to “figure it out” (But the naming was not perfect even in the original files :)) Also, because of GIMP, and the limited options of the DDS export plugin, when alpha channel was needed in the texture… I actually used program called DXTBMP to make the final texture… I have alpha channels exported from original (not painted) textures and stored as .bmp files… mostly, they were not edited… To summarize, it requires kind of specific workflow to use GIMP… but I am sure you will be able to figure it out too.
Installation
The archive should contain these folders:
- texture.N452AS
- texture.N452AS-STOL
- thumbnails
and files:
- aircraft.cfg.txt
- aircraft.cfg.floats.txt
- aircraft.cfg.skis.txt
- aircraft.cfg.skis_stol.txt
- aircraft.cfg.stol.txt
- aircraft.cfg.straight_floats.txt
- aircraft.cfg.straight_floats_stol.txt
- aircraft.cfg.tundra.txt
- aircraft.cfg.tundra_stol.txt
1) Copy folder with textures to Milviz DHC-2 Beaver aircraft folder
Navigate to folder where your Milviz DHC-2 Beaver is installed.You will find it at the “SimObjects\Airplanes\DHC-2 Beaver Milviz“ at your flight sim folder. The whole path might look like this:
C:\Program Files\Lockheed Martin\Prepard3D v4\SimObjects\Airplanes\DHC-2 Beaver Milviz
Those were just examples, the location depends on where you have your flight simulator installed.
There will be more of these folders, depending on whether you have also the expansion pack or just the base pack. Each folder is for separate aircraft variant. And for these variants, there are separate configuration files (listed above). For example, the “aircraft.cfg.txt” contains configuration to put into aircraft.cfg for the base aircraft variant stored in the “DHC-2 Beaver Milviz” folder. The “aircraft.cfg.floats.txt” is for the floats version stored in the “DHC-2 Beaver Milviz Floats“. Etc.
Copy the texture.N452AS folder into the aircraft folder for the variant you want (all if you want).
If you chose aircraft variant, that contains the “STOL” word in it’s folder name, also copy all the files from the “texture.N452AS -STOL” folder into the copied
“texture.N452AS ” folder. Overwrite the existing files. The “texture.N452AS -STOL” folder contains slightly adjusted main texture for the STOL variant of the aircraft.
If you want correct thumbnail picture (does not apply to Prepar3D v4), copy the respective thumbnail file from the thumbnails folder (you will find it, it is named according to Beaver variant) into the copied texture.N452AS folder and rename it to thumbnail.jpg. Overwrite the already included file (which is for base variant).
2) Add repaint to Aircraft.cfg
In the folder you found in step 1, there is a file called Aircraft.cfg. Open this file in notepad or another text editor (For basic text editing, without any formatting. Make sure the file is saved again as Aircraft.cfg, not Arcraft.cfg.txt).
Scroll down the file and look for lines starting with [fltsim.X] where X is some number. There will be [fltsim.0], [fltsim.1] etc. Find the last “fltsim” section and look what the last number is.
Open the included “aircraft.cfg.—–.txt” file that corresponds to the aircraft variant you copied the texture folder for in step 1. Copy the whole content of the file (it is another “fltsim” section) after the last “fltsim” section into Aircraft.cfg you have opened.
Change the “X” in pasted “fltsim” section to the next available number. For example, if the last “fltsim” section in the Aircraft.cfg was [fltsim.2], you will change [fltsim.X] to [fltsim.3].
Save the Aircraft.cfg file.
3) Go flying
That’s it. Prepar3D should now see the new repaint. Select it and go flying.
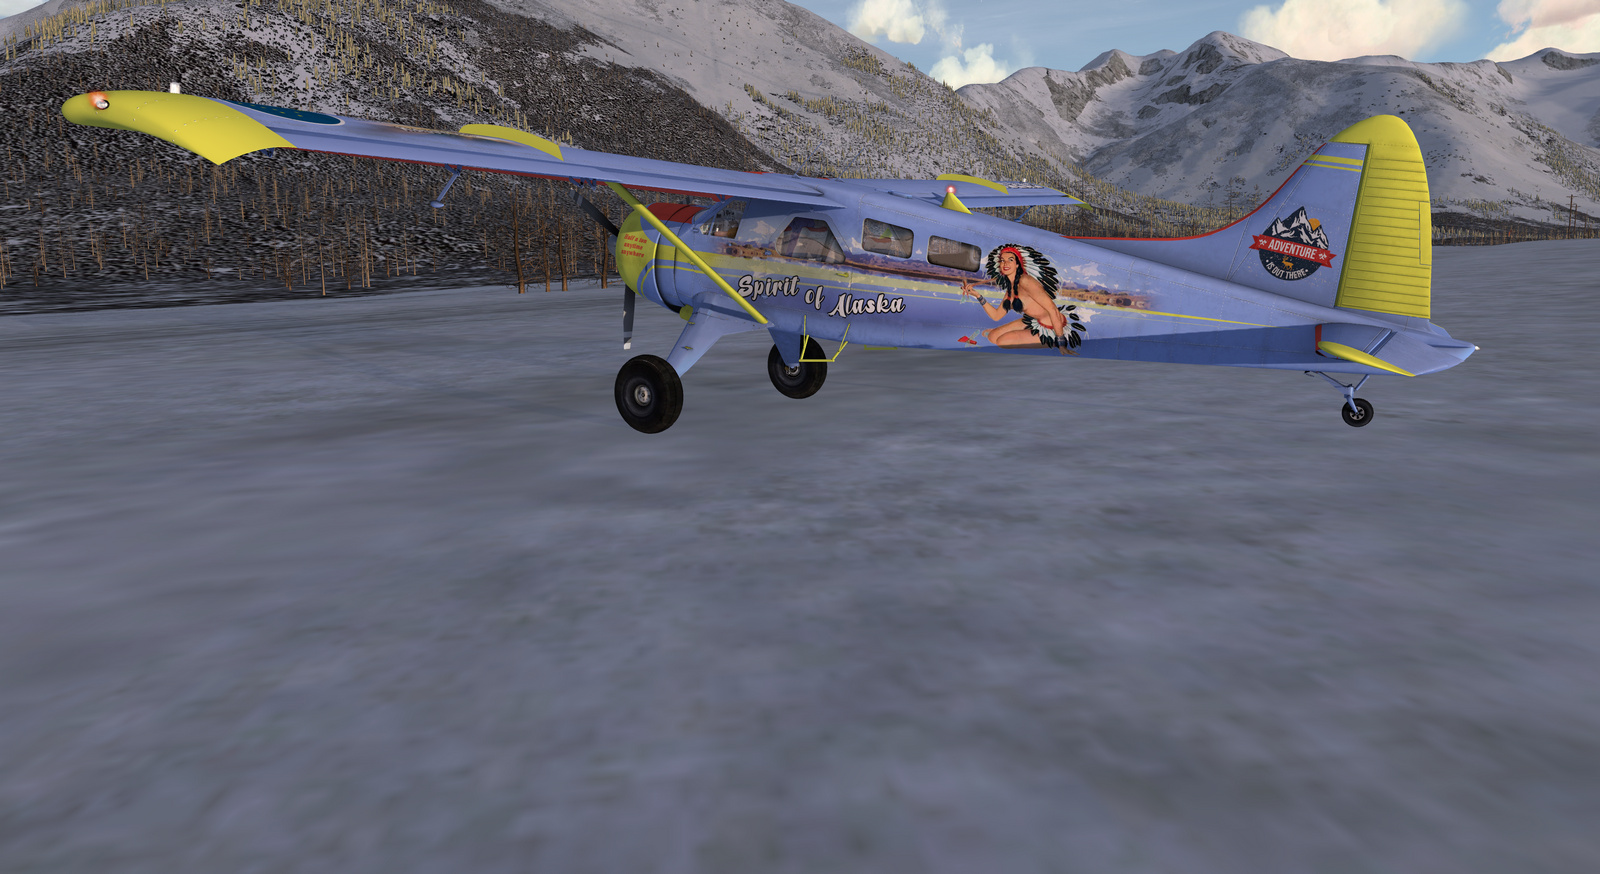
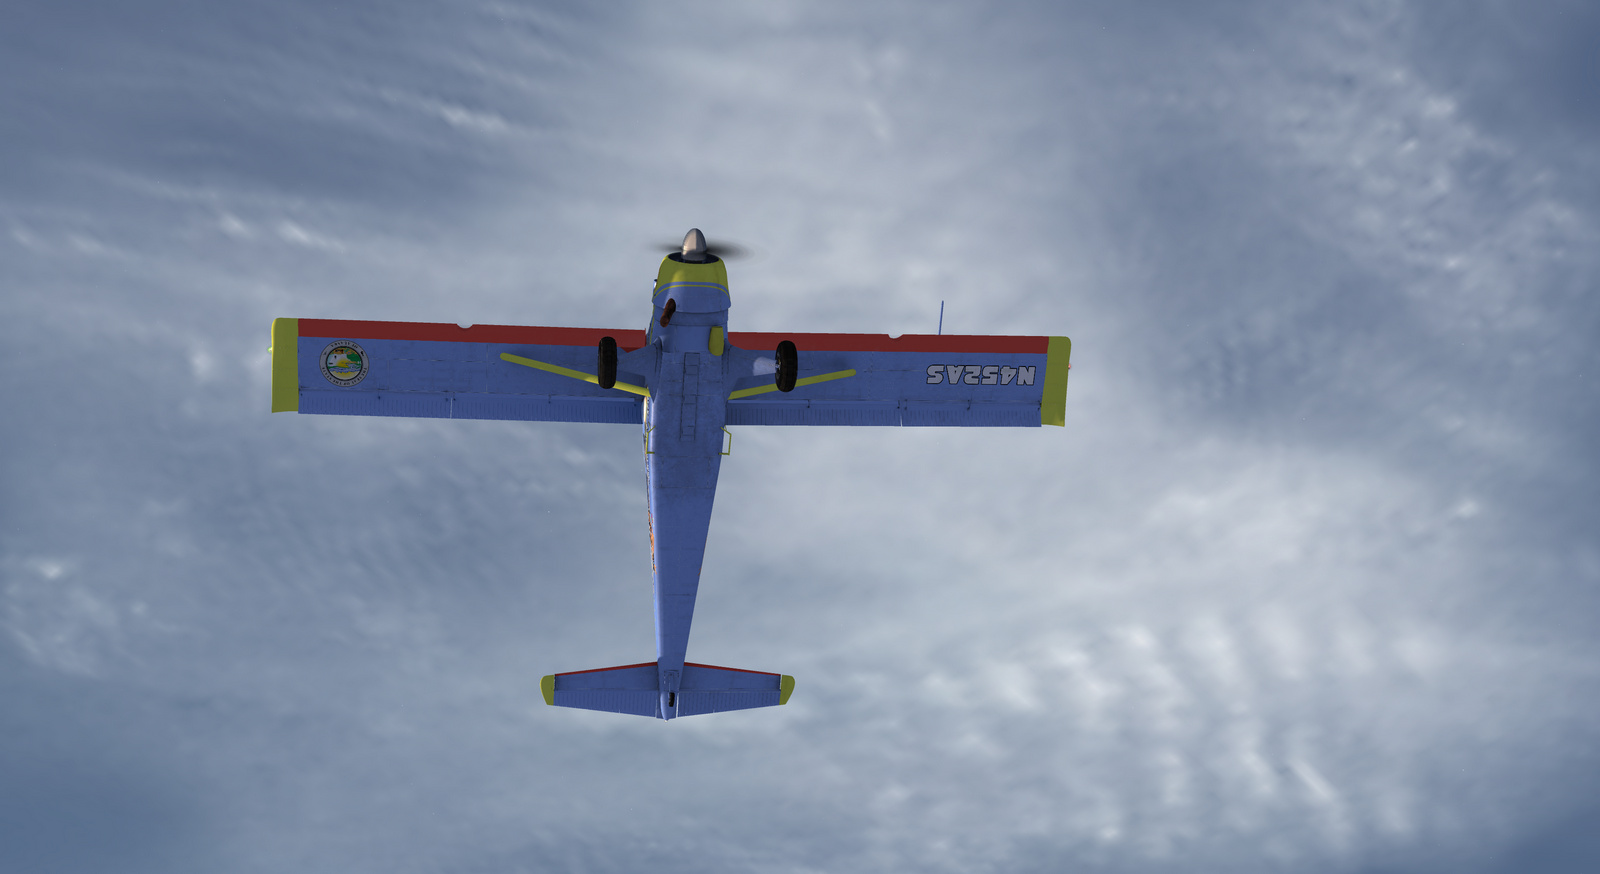
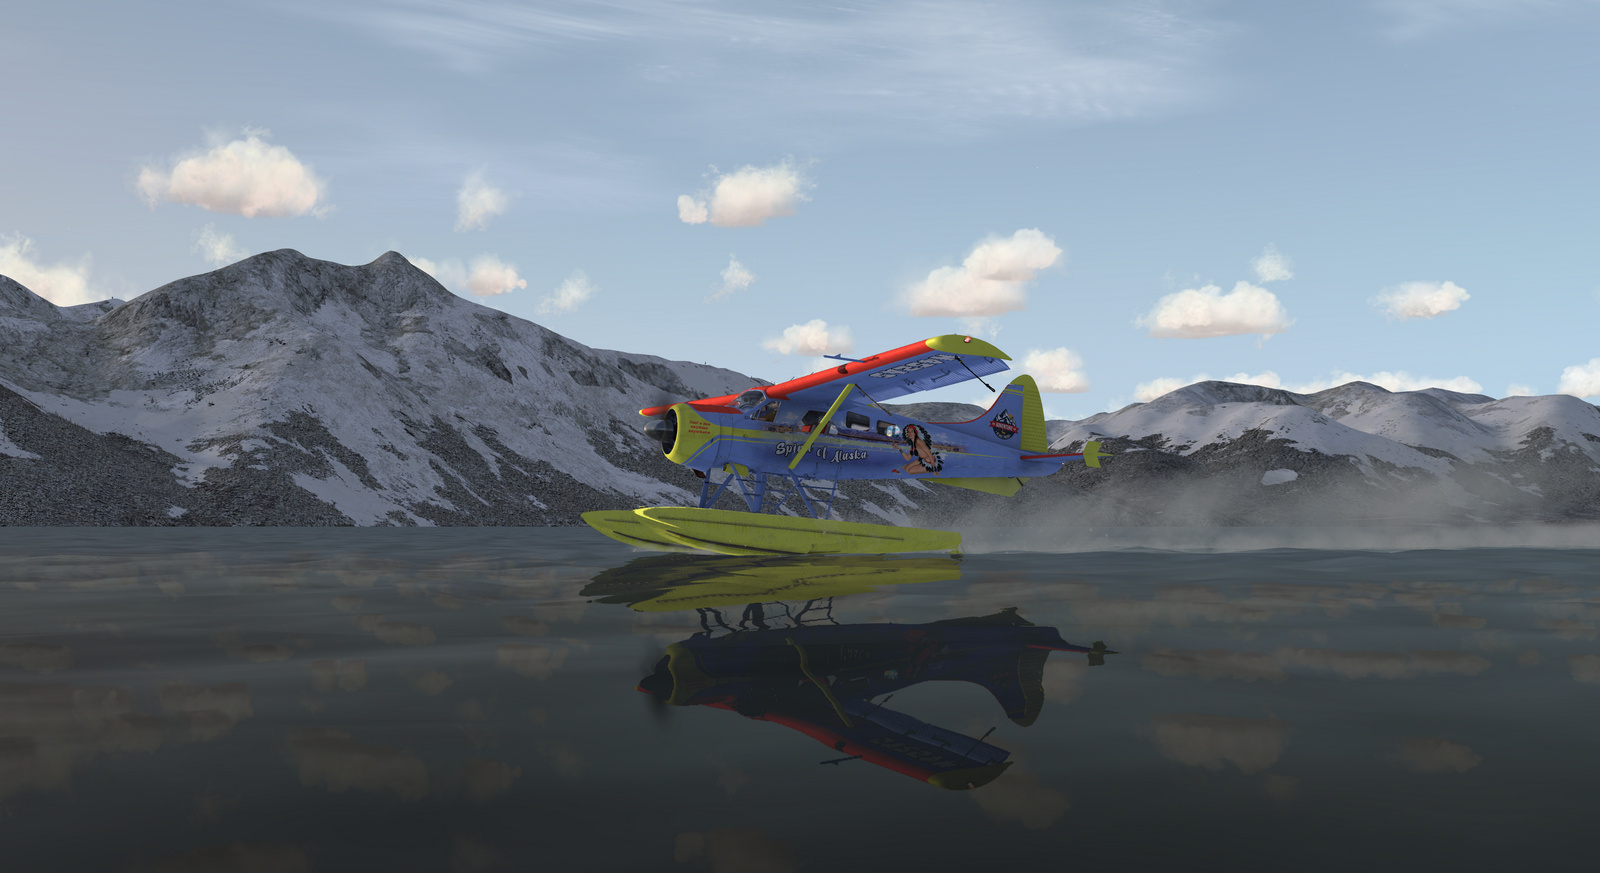
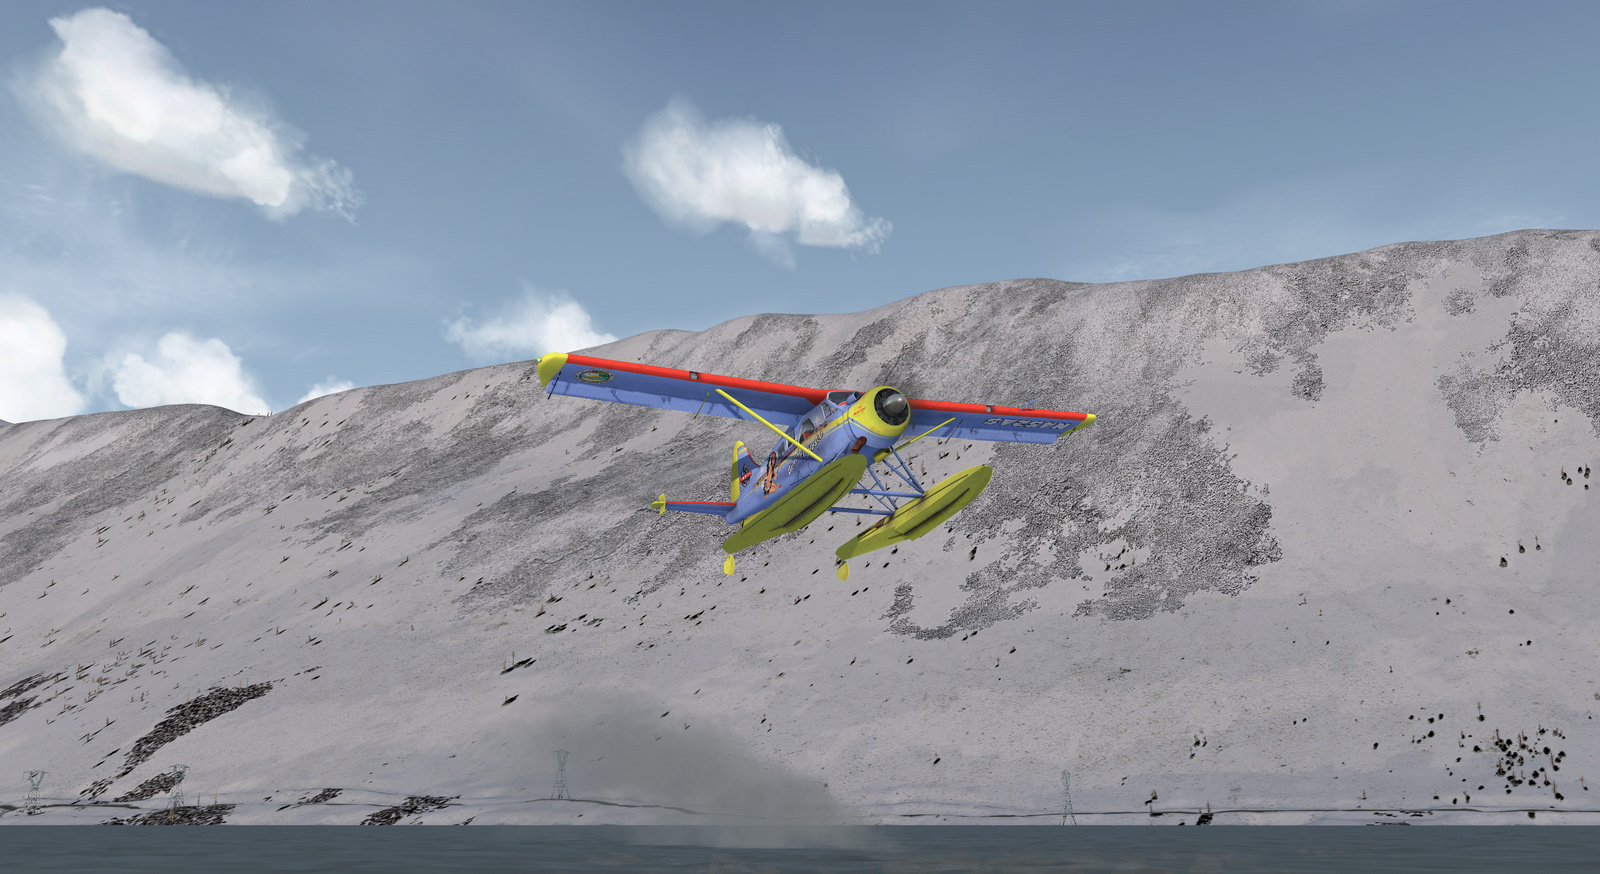
Gallery
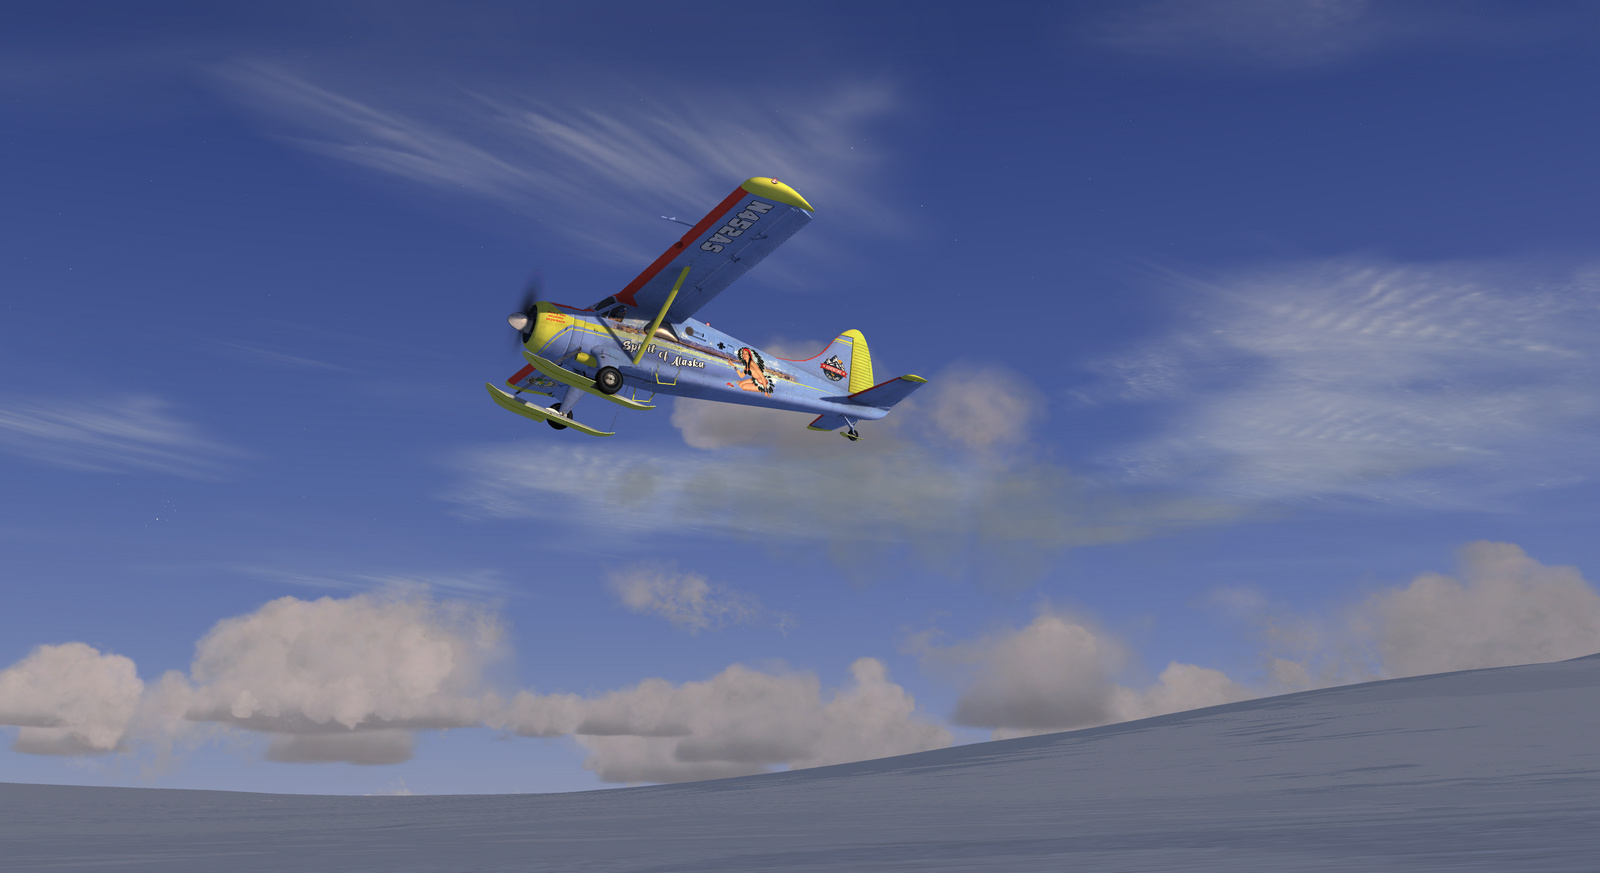
Here are some pictures of the airplane. I took screens of different variants, so you can see the normal, floats, skis and tundra versions. Well, they do not differ, except for the “landing gear”.